After conducting tests and research into using AR I thought it would also be a good idea to conduct some tests using motion graphics within After Effects, as this will be a vital part of my project as it will be the main thing the users will see. I decided to follow a few basic tutorials to help myself in getting used to using the software.
Please follow the link the view the tests I have made as the file size is too large to place directly into WordPress – https://www.behance.net/gallery/58452867/After-Effects-Test
Style Guide
Below I have attached a style guide showing the assets that will be used within my first motion graphic piece.

Preparing an After Effects File – https://engageinteractive.co.uk/blog/how-to-keep-vector-illustrations-crisp-and-hd-ready-for-animation-in-after-effects-cc
In order to achieve the best quality in my motion graphic pieces, as well as an easy and manageable workflow, it was also important that I considered ways and techniques into using After Effects.
One important feature that I will need to ensure is working when animating my illustrator files is the ‘Continuously Rasterize’. By toggling this sunburst icon in After Effects (AE), it is instructing the file asset to redraw itself on every frame it is used. As a result AE will analyse the shape data within the source file and draw it from scratch every time, rather than using a rasterized snapshot of file as it is imported. This will allow me to scale and rotate my Illustrator files within AE, without the the worry of the image becoming distorted.
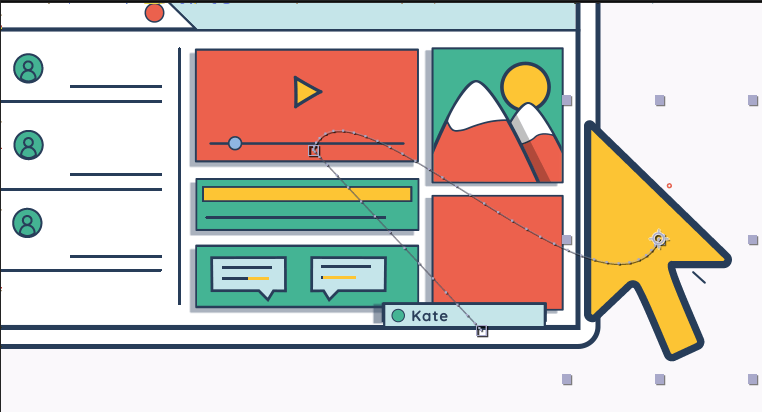
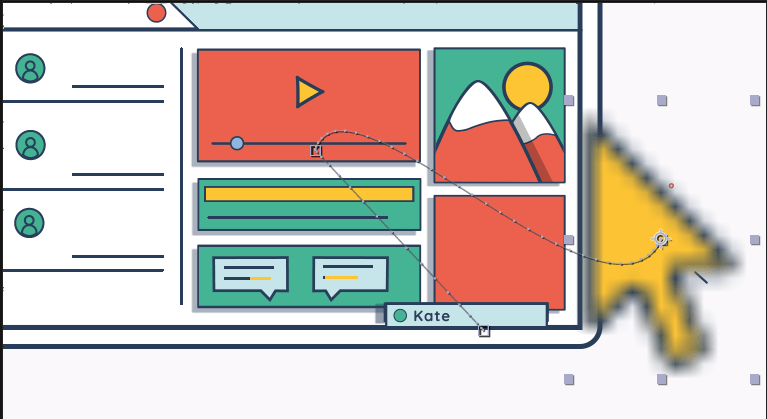
Here is an example to show the impact in quality this option has when creating a motion graphic. The top image shows the illustrator file mouse icon within after effects whilst the continuously rasterize option is ticked. The second image is the same file but without the rasterise ticked.
Comments are closed.